INTRODUCTION
In this tutorial I will show you how to create an abstract background image using Photoshop only. The design has a cool wavy pattern with interesting lighting effects, like the Blackberry 9000 wallpaper. This is a tutorial you can sit down and complete in less than an hour. Let's get started.
In this tutorial I will show you how to create an abstract background image using Photoshop only. The design has a cool wavy pattern with interesting lighting effects, like the Blackberry 9000 wallpaper. This is a tutorial you can sit down and complete in less than an hour. Let's get started.
Step 1:
Create a new document, using a black color for the background.
Create a new document, using a black color for the background.
Step 2:
With the Rectangular Marquee Tool (M), create a rectangular selection. Then select the Gradient Tool (G), and use red for the color of the gradient for both the start and the end, but use 100% and 0% for the Opacity so the gradient will go from red to transparent. Then create a new layer and fill it with the gradient, as in the image below.
With the Rectangular Marquee Tool (M), create a rectangular selection. Then select the Gradient Tool (G), and use red for the color of the gradient for both the start and the end, but use 100% and 0% for the Opacity so the gradient will go from red to transparent. Then create a new layer and fill it with the gradient, as in the image below.
Step 3:
Go to Edit>Transform>Distort and distort the rectangle, as in the image below.
Go to Edit>Transform>Distort and distort the rectangle, as in the image below.
Step 4:
Go to Edit>Transform>Warp. Then select Flag and use 20% for the Bend.
Go to Edit>Transform>Warp. Then select Flag and use 20% for the Bend.
Step 5:
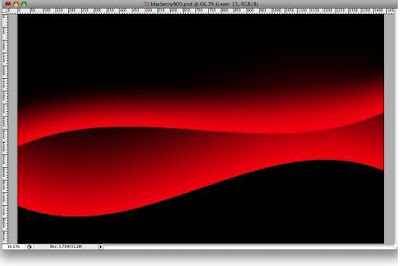
Create another Rectangle and fill it with the same red to transparent gradient. Set the height smaller than the first one. Then repeat the Warp command; however, this time make it to the opposite way, as in the image below.
Create another Rectangle and fill it with the same red to transparent gradient. Set the height smaller than the first one. Then repeat the Warp command; however, this time make it to the opposite way, as in the image below.
Step 6:
Let’s add a Layer Style to the shape. Go to Layer>Layer Style>Inner Shadow, use a light pink color (#ffb3b3). Set the Angle at -90 degrees, Distance 45px, Choke 0%, and the Size 70%.
Let’s add a Layer Style to the shape. Go to Layer>Layer Style>Inner Shadow, use a light pink color (#ffb3b3). Set the Angle at -90 degrees, Distance 45px, Choke 0%, and the Size 70%.
Step 7:
Now go to Filter>Blur>Gaussian Blur, use 2px for the Radius.
Now go to Filter>Blur>Gaussian Blur, use 2px for the Radius.
Step 8:
Repeat Step 6 for the other shape.
Repeat Step 6 for the other shape.
Step 9:
With the Pen Tool (P), create some paths, as in the image below. We will use them to create some light effects.
With the Pen Tool (P), create some paths, as in the image below. We will use them to create some light effects.
Step 10:
First create a new folder, and rename it "Lines". Then change the Blend Mode to Screen. Thereafter select the Brush Tool. Grab a basic brush with 0% Hardness and 13px size. Then with the Direct Select Tool (A), select a path. With the right button of the mouse choose Stroke Subpath. Then the dialog box will open. Make sure that Simulate Pressure is not selected and Press OK.
First create a new folder, and rename it "Lines". Then change the Blend Mode to Screen. Thereafter select the Brush Tool. Grab a basic brush with 0% Hardness and 13px size. Then with the Direct Select Tool (A), select a path. With the right button of the mouse choose Stroke Subpath. Then the dialog box will open. Make sure that Simulate Pressure is not selected and Press OK.
Step 11:
Let’s create a Layer Style for the lines. Use Inner Glow with Color Dodge for the blend mode. Set white as the color, 100% Opacity, Choke 0%, and size 8px. After that select Color Overlay and use pink for the color (#ff5c78).
Let’s create a Layer Style for the lines. Use Inner Glow with Color Dodge for the blend mode. Set white as the color, 100% Opacity, Choke 0%, and size 8px. After that select Color Overlay and use pink for the color (#ff5c78).
Step 12:
Repeat Step 10 with the other paths. Always create a new layer for each path. You can vary the size of the brush, and you can use Simulate Pressure with some paths, as I did in the image below (1, 2, and 3).
Repeat Step 10 with the other paths. Always create a new layer for each path. You can vary the size of the brush, and you can use Simulate Pressure with some paths, as I did in the image below (1, 2, and 3).
Step 13:
Let's Mask some paths, and create new ones duplicating existing paths. With number 1, select the layer of the path and go to Layer>Layer Mask>Reveal all. Then select a brush with 0% Hardness and a medium size, like 50px. Then select black for the color and start masking that line. Repeat this with numbers 2, 3, 4, and 5.
Let's Mask some paths, and create new ones duplicating existing paths. With number 1, select the layer of the path and go to Layer>Layer Mask>Reveal all. Then select a brush with 0% Hardness and a medium size, like 50px. Then select black for the color and start masking that line. Repeat this with numbers 2, 3, 4, and 5.
Step 14:
Here we'll make some adjustments to the shapes. Yet again, select the Shape Layer. Then go to Layer>Layer Mask>Reveal All. Then with a black brush, start masking some areas of the shapes. Tip: you can simply delete the layer as well. Just use the Eraser instead of masking it.
Here we'll make some adjustments to the shapes. Yet again, select the Shape Layer. Then go to Layer>Layer Mask>Reveal All. Then with a black brush, start masking some areas of the shapes. Tip: you can simply delete the layer as well. Just use the Eraser instead of masking it.
Step 15:
Create a new layer beneath the lines but above the shapes. Then select red and select a big 100px brush. Make sure that the Hardness is 0%. Click 1–2 times, only click enough times to create an effect like the one in the image below.
Create a new layer beneath the lines but above the shapes. Then select red and select a big 100px brush. Make sure that the Hardness is 0%. Click 1–2 times, only click enough times to create an effect like the one in the image below.
Step 16:
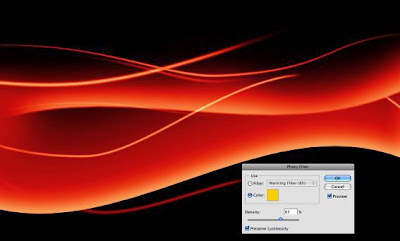
Go to Layer>New Adjustment Layer>Hue and Saturation. Make sure you select Colorize and use Hue 11, Saturation 82, and Lightness +4. Then go to Layer>New Adjustment Layer>Levels. Follow the image below for reference. After that go to Layer>New Adjustment Layer>Photo Filter. Use yellow, and Density of 85%. Make sure that you select Preserve Luminosity.
Go to Layer>New Adjustment Layer>Hue and Saturation. Make sure you select Colorize and use Hue 11, Saturation 82, and Lightness +4. Then go to Layer>New Adjustment Layer>Levels. Follow the image below for reference. After that go to Layer>New Adjustment Layer>Photo Filter. Use yellow, and Density of 85%. Make sure that you select Preserve Luminosity.
CONCLUSION
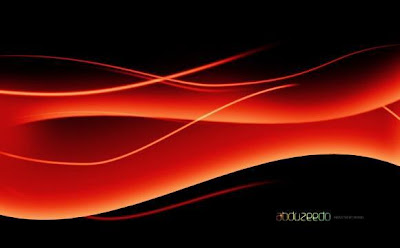
In this tutorial we created an abstract design similar to the new Blackberry's wallpaper. It shouldn't have taken you more than 40 minutes to finish. Even though it might look simple, this tutorial has very useful techniques. You can use them to create some nice lighting effects and wavy designs. Besides that, you will be able to create Vista-style wallpaper using these techniques as well (as some readers requested), just change some colors and Layer Styles and you'll have it.
In this tutorial we created an abstract design similar to the new Blackberry's wallpaper. It shouldn't have taken you more than 40 minutes to finish. Even though it might look simple, this tutorial has very useful techniques. You can use them to create some nice lighting effects and wavy designs. Besides that, you will be able to create Vista-style wallpaper using these techniques as well (as some readers requested), just change some colors and Layer Styles and you'll have it.


0 komentar:
Posting Komentar